Superbike8.co.uk – The ultimate bike search engine and price comparison site

Superbike8.co.uk – The ultimate bike search engine and price comparison site
Clipless Pedals

Clipless pedals connect your cycling shoes to the bike using cleats fixed to the soles. Despite the name, they do not use toe clips: you step into the pedal mechanism and twist your heel to release. Read more
Showing 37–40 of 40 results
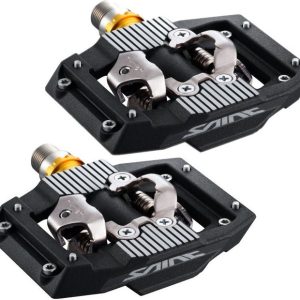
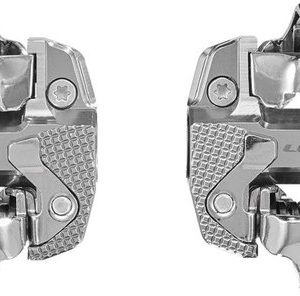
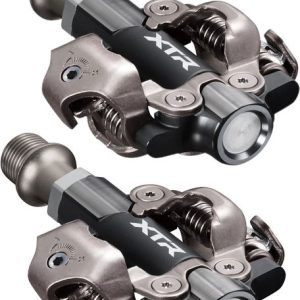
This direct connection can help keep your feet consistently positioned and gives you a secure feel when pedalling, but it also means choosing pedals that work with your shoes and suit your riding.
The main distinction is between compact two-bolt systems commonly used for mountain biking, commuting and touring, and larger road-oriented systems that commonly use three-bolt cleats. The cleats are not interchangeable across systems, and the pedal type also affects how easy it is to walk in the shoes. Other differences include how much side-to-side movement the cleat allows, whether release tension is adjustable and whether the pedal engages on one or both sides.
On SuperBike8 you can compare products and retailer offers for clipless pedals. Before comparing prices, check the exact pedal and cleat system, whether cleats are included, and whether your cycling shoes have the matching mounts. Once you've picked an offer, you continue to the retailer. Ordering, payment, delivery, returns, warranty and customer service are handled directly by that retailer.
Choosing a clipless pedal system
Clipless pedals are not a single universal standard. Each system uses a particular pedal engagement mechanism and matching cleat shape. A shoe designed for recessed two-bolt cleats will not automatically fit a road pedal that requires a three-bolt cleat, and the reverse is also true. Some shoes have fittings for more than one type, but you still need to confirm compatibility with the specific pedal and cleat.
Two-bolt systems are widely associated with mountain biking, gravel riding, touring and everyday cycling. The small cleat is usually recessed into the shoe sole, making it easier to walk than with many road cleats. Road systems commonly use a larger cleat and a broad pedal platform. They are designed around road cycling shoes and can provide a stable pedalling interface, but the exposed cleat may be less convenient for walking.
| Feature | Two-bolt style | Road-oriented three-bolt style |
|---|---|---|
| Common riding uses | Mountain biking, gravel, touring and commuting | Road cycling and sportives |
| Typical shoe fit | Cleat often sits in a recess in the sole, depending on the shoe | Usually fitted to a road shoe with a matching three-bolt pattern |
| Walking considerations | Often more practical for walking, though shoe tread and cleat position matter | The cleat may protrude and can feel less natural on hard floors |
| Key check | Confirm the shoe accepts the pedal's two-bolt cleat | Check the shoe's bolt pattern and the cleat supplied or specified |
These are common design patterns rather than guarantees about every product. Check the manufacturer's specifications for the exact pedal and shoe combination. If your riding includes frequent café stops, walking around town or pushing a bike over rough ground, shoe walkability may be as important as pedal weight or platform size.
Match pedals to how you ride
Mountain biking and trail riding
For off-road riding, consider how easy the pedal is to engage after putting a foot down, and how readily it releases when you need to dab a foot on a technical section. Many off-road pedals engage on both sides, which can make clipping in simpler when you are starting on uneven ground. Some designs have a surrounding platform or cage; this can give the shoe additional support, but the shape and size should suit your shoe and riding preferences.
Mud clearance can also matter. Mud and grit around the cleat or mechanism can make engagement less predictable, so look at the pedal's design and consider how you maintain it. A small, lightweight mechanism may suit a rider prioritising a simple pedal, while a larger body can offer a broader contact area. Neither design is automatically better: check the intended use and pair it with shoes that provide suitable support and protection.
Road cycling and sportives
For road riding, a larger pedal platform and a compatible road shoe are common priorities. A broad interface can feel stable under load, particularly on longer rides, but the complete setup depends on the shoe sole and cleat as well as the pedal. Compare the system as a whole rather than judging the pedal in isolation.
Road pedals are often single-sided, so you may need to orient the pedal before clipping in. If easy engagement at traffic lights or frequent stops is important, consider how the pedal behaves when you approach it and whether you are comfortable finding the engagement side. A double-sided design can make clipping in more straightforward, although it may not have the same construction or feel as a road-specific model.
Commuting, gravel and touring
If you ride in everyday clothes or walk regularly during a ride, two-bolt pedals with recessed cleats and compatible shoes are often worth considering. Some shoes look relatively understated and are easier to walk in than dedicated road shoes, but comfort and grip vary. Check the sole, tread and cleat recess rather than assuming that every two-bolt shoe is equally walkable.
For touring or loaded riding, think about serviceability and the conditions you expect to encounter. A pedal that is straightforward to clean and maintain may be more useful than a small weight saving. If your route includes long climbs, wet weather or rough surfaces, make sure the shoe and cleat remain secure and comfortable over the expected ride duration.
Float, release and getting used to clipless pedals
Float is the amount of rotational movement your foot can make while remaining attached to the pedal. Some cleats allow more angular movement than others; some offer very little. Float can help accommodate natural movement at the ankle and knee, but the right amount is personal and depends on the cleat system, shoe position and your comfort. Check the pedal or cleat specifications rather than assuming that all cleats for a system provide the same float.
Release tension describes how much force is needed to twist out of the pedal. Many pedals provide a tension adjustment, while others have a fixed setting. Lower release tension can make it easier to unclip while learning or when you need to put a foot down often. A firmer setting may feel more secure to some experienced riders, but it should not make releasing the pedal difficult or uncomfortable. Follow the manufacturer's instructions for adjustment and check that both pedals release as expected.
Give yourself time to practise before relying on the system in traffic or on technical terrain. Start somewhere quiet, practise clipping in and out while stationary with support, and then try short rides in a low-pressure setting. Anticipate stops and unclip early until the movement becomes familiar. If release feels inconsistent, inspect the cleat and mechanism for wear, dirt or incorrect adjustment.
Cleat position and shoe compatibility
Compatibility is the first practical check when buying clipless pedals. Confirm the cleat system specified by the pedal, the bolt pattern on your shoe and whether the correct cleats are included. A shoe with a two-bolt fitting is different from a shoe that only accepts a three-bolt cleat. Some soles accept more than one fitting, but available adjustment and the way the cleat sits can depend on the shoe.
Cleat position affects how your foot sits on the pedal and can influence comfort. The shoe's adjustment range, cleat shape and the position of your foot all matter. Follow the shoe and cleat manufacturer's fitting guidance, make small changes and test them on a short ride. If you have persistent pain or numbness, do not assume that changing pedal tension alone will solve it; shoe fit, cleat position and other bike-fit factors may also be involved.
Check the cleat's condition regularly. The contact surfaces can wear, particularly if you walk on them, and a worn cleat may engage or release differently from a new one. Recessed cleats are generally less exposed than road cleats, but their condition still needs checking. Replace cleats when the manufacturer indicates they are worn or when engagement becomes unreliable.
Pedal construction, weight and maintenance
Clipless pedals vary in body material, axle construction, bearing arrangement and sealing. These details can affect weight, durability, serviceability and the way the pedal stands up to wet or dirty riding. A lighter pedal may appeal to a road or cross-country rider, but it is not automatically the best choice for commuting, touring or frequent muddy use. Consider the conditions and whether replacement parts or servicing information are available for the specific model.
Bearings and seals are hidden from view but are relevant to long-term use. Keep pedals clean, avoid directing high-pressure water at bearing areas and follow the manufacturer's maintenance instructions. If a pedal develops play, rough rotation or unreliable engagement, inspect it rather than continuing to ride without checking. The maintenance procedure and availability of service parts vary between models.
Pedals use a threaded axle that fits into the crank arm. Confirm the pedal's thread specification and any installation requirements, especially if you have unusual, older or specialist cranks. Pedals are handed: the left and right sides have different thread directions, so fitting them to the wrong crank side can damage the threads. Use the markings and instructions supplied with the pedals, and ensure the threads are clean and correctly started before tightening.
Some crank and pedal combinations may require attention to washers or clearance. Do not add or omit washers without checking the manufacturer's instructions. If you are unsure about fitting, ask a qualified bike shop to install them. Correct installation is important because a damaged crank thread can be costly to address.
Comparing clipless pedal prices and versions
Retailers can list different prices for the same pedal, and the price shown may not represent the same package. Check whether cleats are included, whether the listing is for a pair, and whether it is a pedal set or a replacement part. Some retailers may offer a pedal with a particular cleat option or additional accessories, so compare the full product description rather than relying on the model name alone.
Colours, finishes and previous-year versions may be priced differently. An older colourway can be a good-value option if the specification suits you, but similar model names do not guarantee identical details. Compare the exact version, included cleat and technical specification before choosing. Delivery costs can also affect the total price, and the retailer's listing should confirm what is included and how the purchase is handled.
On SuperBike8 you can compare available products and retailer offers, then continue to the retailer you choose. SuperBike8 does not sell or dispatch the pedals. Ordering, payment, delivery, returns, warranty and customer service are handled directly by the respective retailer.
If you are also considering a different pedal style, compare the available pedals or view flat pedals. For other riding equipment, browse cycling accessories.
Typical buying mistakes with clipless pedals
- Buying before checking shoe compatibility: Cleat bolt patterns and pedal systems differ. Confirm the shoe fitting and the pedal's specified cleat.
- Assuming cleats are included: Check the product contents, as a listing may differ in whether it includes cleats or other parts.
- Choosing a road system for frequent walking: A protruding cleat can be awkward on foot. Consider a recessed cleat and walkable shoe if your ride includes stops or errands.
- Ignoring how often you need to clip in: A single-sided pedal may require more attention to orientation at starts than a double-sided model.
- Setting release tension too high too soon: Practise with a manageable setting and adjust according to the manufacturer's instructions and your control.
- Assuming all cleats have the same float: Float and release behaviour differ. Check the exact cleat specification and choose a setup that feels comfortable.
- Overlooking cleat wear: Worn cleats can affect engagement and release. Inspect them and replace them when needed.
- Comparing unlike packages: Confirm whether the offer is for a pair, a set with cleats or a single replacement part.
- Fitting pedals on the wrong side: Left and right pedal threads differ. Check the markings and installation instructions to avoid damaging the crank.
- Comparing only the headline price: Check delivery costs, exact model version and included parts on the retailer's offer.
Three typical buying decisions for Clipless Pedals
1. You ride trails and want to walk comfortably between sections
Prioritise a two-bolt pedal and shoe combination designed around a recessed cleat, then check the shoe's tread and walking comfort. If you often need to put a foot down, consider how easily the pedal engages and releases, and practise the release movement before riding technical routes. Do not assume every two-bolt shoe is equally comfortable off the bike.
2. You ride road miles and want a stable pedalling platform
Compare road-oriented pedals with shoes that accept the matching cleat. Check the cleat's float, the pedal's engagement arrangement and whether the cleats are included. If you stop frequently, consider whether a single-sided pedal suits you and allow time to get used to finding the engagement side.
3. You commute or tour and need a versatile setup
Think about the whole day, not just the time spent pedalling: walking, wet conditions, cleaning and ease of clipping in can all affect your choice. A two-bolt system with a walkable shoe may be a practical option, provided the shoe fits well and the cleat matches the pedal. Compare the exact package and check the retailer's total price, including delivery.
Your checklist before you order
- Does the pedal use a cleat system that matches your cycling shoes?
- Does your shoe have the correct bolt pattern, and is there enough cleat adjustment for your needs?
- Are the cleats included, and is the offer for a pair or a different quantity?
- Is the system suited to your riding: road, trail, gravel, commuting or touring?
- Would a recessed cleat make walking easier for your regular rides?
- Do you prefer a single-sided or double-sided pedal for starting and clipping in?
- Have you checked the cleat's float and release characteristics?
- Can release tension be adjusted, or is it fixed on this model?
- Have you considered mud clearance and cleaning for the conditions you ride in?
- Does the pedal axle fit your crank, and have you checked any installation requirements?
- Have you confirmed the left and right pedal markings before fitting?
- Is the model year or colour variant the same specification you intend to compare?
- Have you checked the retailer's delivery costs and offer details?
- Are you prepared to practise clipping in and releasing before riding in traffic or on technical terrain?
Frequently asked questions about Clipless Pedals
What are clipless pedals?
Clipless pedals attach to a cleat fixed to a compatible cycling shoe. You step into the mechanism to engage and twist your heel to release. The name distinguishes them from older toe-clip arrangements, even though the shoe is mechanically attached to the pedal.
Are clipless pedal cleats universal?
No. Cleat shape, bolt pattern and engagement mechanism vary between systems. Check the pedal's specified cleat and your shoe's fittings. Even where two products use a similar number of bolts, that does not by itself confirm compatibility.
Are two-bolt or three-bolt pedals better for beginners?
Neither is best for everyone. Two-bolt systems are often paired with shoes that are easier to walk in, while road-oriented three-bolt systems are commonly used with road shoes. Choose according to your riding, footwear and comfort, then practise clipping in and releasing somewhere quiet.
What does float mean on a cleat?
Float is the angular movement your foot can make while remaining attached to the pedal. The amount depends on the cleat and pedal system. Check the specific product details and consider comfort and fit rather than assuming every cleat in a system behaves identically.
Do clipless pedals come with cleats?
It depends on the product and retailer listing. Check the contents carefully before comparing offers, and confirm that any included cleats are compatible with your shoes. You may need to buy cleats separately if they are not part of the package.
Can I walk in clipless cycling shoes?
That depends on the shoe and cleat. Many shoes for two-bolt systems recess the cleat into the sole, which can make walking more practical. Road shoes with larger exposed cleats may be less comfortable to walk in. Check the shoe's tread, sole and cleat position for your intended use.
How should I get used to clipless pedals?
Practise clipping in and releasing while stationary with support, then try short rides in a quiet area. Unclip before you stop until the movement becomes familiar. Use the manufacturer's instructions for pedal tension and cleat fitting, and check the setup if engagement or release feels unreliable.
How often should clipless cleats be replaced?
There is no single replacement interval for every rider or cleat. Wear depends on the cleat design, how much you walk and the conditions you ride in. Inspect cleats regularly and follow the manufacturer's wear guidance; replace them if they are damaged or engagement and release become unreliable.