Superbike8.co.uk – The ultimate bike search engine and price comparison site

Superbike8.co.uk – The ultimate bike search engine and price comparison site
Helmet & Head Torches

Helmet lights and head torches put a beam where you are looking, rather than only pointing straight ahead from the bike. That can be useful on unlit lanes, tracks and trails, particularly when checking a bend, junction or route off the main line of travel. Read more
Showing all 2 results
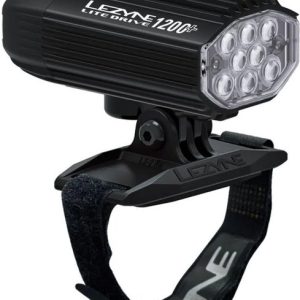
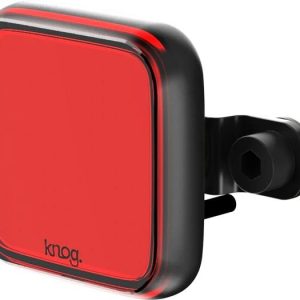
The category can include lights designed to attach to a helmet as well as head torches worn on a headband; they are related, but their mounts and best uses are not necessarily the same.
Before comparing models, decide whether you need a supplementary light for seeing, a way to be more visible, or a torch that can also be used away from the bike. Consider the beam shape and controls as well as brightness claims: a sharply focused beam may help you pick out a distant feature, while a broader beam can make nearby surroundings easier to see. A light that moves with your head can also shine towards other road or trail users, so its position and aim matter.
SuperBike8 is a price comparison site, not a retailer. You can compare available products and retailer offers here, then continue to the retailer you choose. The current comparison in this category contains a small selection, so check each listing’s exact mounting system, included parts and specifications rather than assuming similar-looking lights work in the same way. For other options, browse Bike Lights, including Rechargeable Bike Lights.
Helmet-mounted light or head torch?
A helmet-mounted bike light is intended to attach to a helmet, usually using a dedicated bracket, strap or mount. A head torch is generally worn on an adjustable headband and may be designed for walking, camping or general use as well as cycling. Some lights can be adapted for more than one setup, but only if the correct mount is supplied or available and the manufacturer confirms compatibility.
| Type | Useful for | Points to check |
|---|---|---|
| Helmet-mounted light | A supplementary beam that follows your gaze on dark roads, paths or trails. | Helmet and mount compatibility, secure attachment, weight and how the beam can be aimed. |
| Head torch | Cycling where a headband is practical, plus walking, repairs or other tasks away from the bike. | Whether the band fits comfortably under or over your helmet, and whether a cycling mount is included or compatible. |
If you already own a good handlebar light, a helmet light can add a second angle rather than replace it. The handlebar beam stays pointed towards the road while the helmet beam turns with your head. That combination can help you look into a corner, but it also means the helmet light can briefly point at an oncoming rider or driver. Keep the beam aimed thoughtfully and use a lower setting where appropriate.
Choose by where and how you ride
Unlit roads and commuting
For regular riding on unlit roads, think of a helmet light as an additional source of illumination and not automatically as your only road light. A fixed bike light gives a stable beam, while a helmet light can fill in areas you look towards. Check the applicable UK lighting requirements and the instructions for the specific product; a helmet-mounted light may not meet every requirement for a bicycle’s road lighting. Make sure your bike has suitable lights for the journey and that the helmet light does not dazzle other people.
Trails and off-road riding
On a dark trail, being able to look through a turn or scan the ground can be valuable. A helmet light can work alongside a handlebar light to give a more useful view of the route. Consider whether the beam reaches far enough for your pace while still showing nearby roots, stones and changes in surface. A very narrow beam may leave the sides of the trail dark; a broad beam may be less effective at picking out distant features. The right balance depends on the terrain, speed and what your main light already provides.
Repairs and use away from the bike
If you want one light for riding and roadside repairs, a head torch can be convenient because it leaves both hands free and can be taken off the helmet. Check whether it remains comfortable when worn with your helmet and whether its mounting arrangement suits both uses. A helmet-specific bracket may be more secure for riding, while a headband may be easier to adjust for walking or working on the bike. Do not assume that a light supplied with one type of mount includes the other.
Beam pattern, brightness and aiming
Lumen figures can help compare stated light output, but they do not describe the whole beam. Optics, beam width and how the light is directed affect what you can see. Read product details for information about the beam and modes, and consider how they suit your routes. A high-output setting may be useful on a dark trail, but can be excessive around other road users or shorten the time between charges. Lower modes may suit lit streets or provide a way to conserve battery power.
Because a helmet light follows your head, its aim changes as you look around. That is useful for checking a junction or looking into a turn, but it can also put the beam into another person’s eyes. Practise setting the angle before riding and check it again once the helmet is on. A light that is easy to adjust can be helpful, but the mount should hold its position over bumps and should not interfere with the helmet’s normal fit or function.
Mounting, comfort and helmet compatibility
Helmet shapes and vent layouts vary, so a mount that fits one helmet may not fit another. Check the manufacturer’s compatibility information and the product listing for the attachment method. A strap or bracket must be secure without obstructing vents, covering important helmet features or requiring changes that the helmet maker does not recommend. Do not force a mount into a position where it can slip or make the helmet uncomfortable.
Weight and balance matter because the light sits higher than a handlebar lamp. A heavier unit may feel noticeable, particularly on longer rides or when riding over rough ground. Some designs position the battery separately from the light, while others have an integrated unit; check the product details rather than assuming a particular layout. If there is a separate battery, consider where it is intended to sit and whether its cable can be routed safely without snagging or restricting movement.
For a head torch, check the headband adjustment and whether it can be worn comfortably with your helmet. A band that feels fine on its own may create pressure beneath a helmet, while a helmet-mounted bracket may be a better fit for regular cycling. The correct choice is the setup that stays secure and comfortable during your actual ride, not simply the one with the most mounting options listed.
Battery, charging and controls
Check how the light is powered and charged, and whether the charging cable or other required parts are included. A rechargeable light is convenient if you can charge it between rides, but remember to check its charge before setting off. If the product uses replaceable batteries, confirm the type and how practical it is to carry spares. Do not compare runtime claims without checking the mode they refer to: a figure for a low setting may not represent use at the brightness you need.
Controls should be manageable while wearing gloves and easy to identify without taking your attention away from the road. Look for clear information about mode changes, battery indication and any lock function intended to prevent accidental activation in a bag. If you switch between several modes, consider whether the control sequence is straightforward enough for use while stopped at the roadside.
Weather resistance varies by product. Check the maker’s stated guidance for rain, cleaning and storage rather than assuming every light is suitable for prolonged exposure to wet conditions. After riding in poor weather, dry the light and mount as recommended, and keep charging contacts clean. Do not charge a wet unit unless its instructions explicitly permit it.
Comparing products and retailer offers
With a small number of listings, differences in the supplied mount or intended use may be more important than a headline brightness figure. Compare the exact model and version, included brackets, battery arrangement, charging method and stated operating modes. Similar product names can refer to different packages, so check whether a listing is for the light alone or includes the parts needed to attach it to a helmet.
Retailers may price colours, versions and previous-year models differently. An older version can still suit your needs, but check whether its mount, charging connection, controls or other specifications differ from a newer one. Delivery costs can affect the total price, and the retailer’s listing should clarify what is included. On SuperBike8 you compare products and retailer offers; after choosing an offer, you continue to that retailer. Ordering, payment, delivery, returns, warranty and customer service are handled by the respective retailer.
If you are comparing options beyond helmet lights, the wider Bike Lights category may help you consider a handlebar-mounted primary light. You can also browse Bike Light Accessories or the wider Accessories category for related equipment. Check that any accessory is intended for your chosen light and mounting system.
Typical buying mistakes with Helmet & Head Torches
- Assuming every light fits every helmet: check the attachment method and manufacturer compatibility before comparing prices.
- Using a helmet light as the only road light without checking: confirm the product’s intended use and relevant UK lighting requirements; a supplementary helmet light is not automatically a substitute for suitable bike lights.
- Choosing by lumens alone: beam shape, aim and usable modes affect what you can see and how considerate the light is to others.
- Overlooking glare: a beam that turns with your head can point towards other people, so check the angle and use an appropriate mode.
- Buying a head torch without checking helmet comfort: verify that its headband or mount works with your helmet rather than relying on fit when worn on its own.
- Assuming a mount is included: read the package contents and check whether you need a separate helmet bracket or strap.
- Comparing runtime figures from different modes: look for the mode used in the stated runtime and decide whether it matches your intended brightness.
- Forgetting charging or battery details: check the power source, charging method and whether any required cable or batteries are supplied.
- Ignoring total cost: include delivery costs and any compatible mount that must be bought separately when comparing retailer offers.
Three typical buying decisions for Helmet & Head Torches
1. Add a helmet light to an existing bike light
If your handlebar light already provides a stable beam, choose a helmet light that complements it by helping you look into bends and towards junctions. Prioritise a secure compatible mount, manageable weight and easy aiming. You may not need the highest output available if the light is mainly filling in the area you look towards.
2. Choose a light for dark trails
For off-road riding, consider how the helmet beam works with your handlebar light and the kind of terrain you ride. A useful setup should help you see both the route ahead and nearby surface details, without making the beam difficult to control around other riders. Check the mount stays secure on your helmet and that the controls are practical with gloves.
3. Pick a head torch for cycling and general use
If you want a light that can also help with walking or repairs, a head torch may be more versatile than a dedicated helmet unit. Before choosing, check whether it can be worn comfortably with your helmet or whether a separate cycling mount is available. A versatile torch is only a good value if its fit, attachment and beam are suitable for the riding you actually do.
Your checklist before you order
- Decide whether you need a helmet-mounted bike light, a head torch or a supplementary light for an existing setup.
- Check that the mount fits your helmet and is approved or recommended for that use by the relevant manufacturers.
- Confirm whether the required helmet bracket, strap or headband is included.
- Compare beam shape and modes as well as stated brightness.
- Consider how the beam will behave when you turn your head and how you will avoid dazzling others.
- Check the light’s weight and how it is balanced when attached to your helmet.
- Review the battery type, charging method and contents of the package.
- Compare runtime claims using the mode you expect to use.
- Check the controls and battery indication are practical for your rides.
- Read the manufacturer’s guidance on weather exposure, cleaning and charging.
- For road use, check the product’s intended role and applicable UK lighting requirements; do not assume a helmet light replaces suitable bicycle lights.
- Compare the exact model or version, not only the product name or colour.
- Check whether the offer is for a light alone or a bundle with mounts and other parts.
- Include delivery costs when comparing retailer offers.
- Read the retailer’s terms for ordering, delivery, returns, warranty and customer service before proceeding.
Frequently asked questions about Helmet & Head Torches
Are helmet lights suitable as a bicycle’s only light?
Do not assume so. A helmet light is often best treated as a supplementary light, and its suitability for road use depends on the specific product and how it is used. Check current UK lighting requirements and the manufacturer’s instructions, and use appropriate bicycle lights for your journey.
Can I attach any head torch to a cycling helmet?
No. Helmet shapes, vents and mounts vary, and a headband may not hold a torch securely on a helmet. Check the light manufacturer’s compatibility information and use only an attachment intended for that setup. Do not force a mount or alter the helmet.
Is a higher lumen figure always better?
Not necessarily. Lumens describe stated light output, but beam shape, optics, aim and available modes also affect how useful a light is. A very bright beam can be uncomfortable for others if aimed poorly, so choose for your routes and riding conditions rather than relying on one figure.
Should I use a helmet light with a handlebar light?
For many riders, the two can complement one another: a handlebar light points steadily ahead while a helmet light follows your gaze. The combination may help on dark roads and trails, but make sure both lights are aimed considerately and that your helmet mount is secure.
What should I check before comparing offers?
Compare the exact model, mount, included parts, battery and charging details, modes and stated runtime. Check whether the offer is for a complete setup or the light alone, and include delivery costs when assessing the total. Ordering and other after-sales arrangements are handled by the retailer you choose.