Superbike8.co.uk – The ultimate bike search engine and price comparison site

Superbike8.co.uk – The ultimate bike search engine and price comparison site
Bike Light Accessories

Bike light accessories help you fit, position, power or maintain a lighting setup. Depending on the product, an accessory might be a replacement or additional mount, a charging lead, a battery-related part or another item intended to work with a bike light. Read more
Showing all 2 results
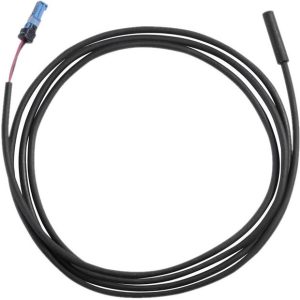
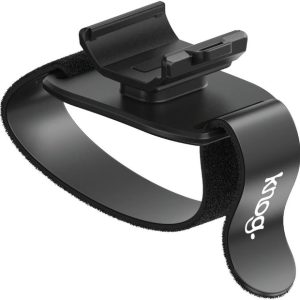
The important point is compatibility: accessories that look similar may use different fittings, connections or dimensions.
Before comparing options, identify the make and model of your light and what you need the accessory to do. A spare mount can be useful if you move one light between bikes, while a replacement charging lead needs to match the light’s connection. For a mount, check how it attaches to the bike and whether it holds the light in the position you need. Do not assume that a generic-looking part will fit a particular model.
SuperBike8 is a price comparison site, not a retailer. You can compare products and retailer offers, then continue to the retailer you choose. Ordering, payment, delivery, returns, warranty and customer service are handled directly by that retailer. The category has a small selection, so read each product description carefully and compare the specified model, intended use and included parts rather than relying on a product title alone.
If you need a complete lighting unit rather than an accessory, browse Bike Lights. For a particular kind of light, related categories include Rechargeable Bike Lights, E-Bike Lights and Helmet & Head Torches. Those are different product types, so check whether you need a replacement part for an existing light or a new light itself.
What counts as a bike light accessory?
The term covers components that support a bike light rather than necessarily providing illumination themselves. The exact products available in this category can vary, so use each listing’s description and compatibility information to establish what is being compared. Common accessory purposes include securing a light to a bicycle, replacing a missing or damaged fitting, or connecting a compatible light to a power source for charging.
Some accessories are designed for a specific light model or product family. Others may be described as compatible with a wider range, but that still does not mean they fit every light. Mounting interfaces, strap lengths, handlebar diameters, connector shapes and the position of attachment points can differ. If a listing names supported models, treat that information as more reliable than a general resemblance in photographs.
| Accessory purpose | What to verify | When it may be useful |
|---|---|---|
| Mount or bracket | Light model, attachment design, fitting position and any stated handlebar or frame compatibility | Replacing a lost or damaged mount, or keeping a compatible mount on another bike |
| Charging lead or power-related accessory | Connector type, supported light model and whether the listing includes only the lead or additional equipment | Replacing a missing or unsuitable lead for a rechargeable light |
| Replacement or additional fitting part | Part number or named compatibility, quantity supplied and whether any fasteners are included | Restoring a secure fit or setting up a compatible light for another mounting position |
| Accessory for an e-bike lighting system | Whether it is intended for the particular light and e-bike system, plus any installation requirements | Replacing or adapting a component on a compatible e-bike lighting setup |
The table describes broad purposes, not a guarantee that every type is available in this category. In particular, e-bike lighting components can depend on the bike’s electrical system and the light fitted to it. Check the product documentation or ask the retailer or relevant manufacturer if compatibility is unclear; do not connect an accessory to an e-bike system based only on the shape of a plug or its advertised voltage.
Start with the light you already own
The quickest way to avoid an incompatible purchase is to record the full model name of the light before comparing accessories. Look for a label on the light or its packaging, and check the manufacturer’s product information if you still have it. A brand name alone may not be enough: one manufacturer can use different mounts or charging connections across its range.
Compare the accessory’s named compatibility against your exact light model. Product photographs can help you recognise a fitting, but they are not a substitute for a model list or technical description. If the retailer listing gives only a broad description, such as “bike light mount”, without enough detail to identify the interface, seek clarification before choosing it.
Also check whether the accessory is supplied individually or as part of a set. A photograph may show multiple pieces, but the listing may include only one component. Confirm the stated quantity, any included straps or fasteners, and whether you need to reuse parts from your existing setup. On SuperBike8, compare like with like: a single replacement part should not be treated as equivalent to a bundle containing several components.
Choosing a mount and fitting position
A mount needs to hold the light securely and place it where it can illuminate the route without obstructing other equipment. For a handlebar fitting, check both the mounting method and the space available around the bars. A computer, bell, brake lever, handlebar bag or other accessory can limit the available area. If you use an unusual bar shape or a crowded cockpit, confirm that the mount can fit in the intended position before comparing prices.
Some mounts use a flexible strap or band, while other designs use a more fixed clamp or a model-specific interface. Flexible fittings may suit different positions, but their range and compatibility still depend on the product. A fixed fitting can provide a neat match for a particular light, but may be less useful if you want to move that light between bikes. Neither style is automatically better: choose according to the light, the bike and how often you expect to remove or reposition it.
Consider the direction in which the light will point once fitted. A mount that places a light too high, too low or at an awkward angle may make it difficult to aim properly. Check whether the accessory allows adjustment and whether that adjustment remains secure when riding over rough surfaces. After fitting, follow the light and mount instructions, tighten the attachment as specified and check that the beam points where intended without dazzling other road users.
If you want to use one light on more than one bicycle, an additional compatible mount may be more convenient than repeatedly removing a single mount. This only works if the accessory fits both the light and each bike’s intended mounting position. Different handlebars, stems and frame layouts can call for different arrangements, so establish the fit on each bike rather than assuming one attachment will suit them all.
Charging and power compatibility
For a rechargeable light, a replacement charging lead must match the light’s connection and charging requirements. Connector shape is a useful first check, but it is not sufficient on its own: similar-looking connectors may not have the same specification. Use the manufacturer’s information or the product listing to confirm compatibility, and follow the charging instructions supplied with the light.
Check what is included before comparing prices. A listing may cover a cable only, while another product may include additional components. Do not assume that a wall plug, adapter or other charging equipment is included unless the description says so. If a lead has been lost, compare the required connector and supported model rather than selecting the first cable that appears to fit.
Keep charging connections clean and dry, and inspect cables for damage. Do not use a cable with exposed conductors, a damaged connector or signs of overheating. If a light’s charging port is loose or damaged, a new lead may not solve the problem; consult the product instructions or seek appropriate service rather than forcing the connection.
Weather, security and everyday use
UK riding often means dealing with rain, road spray, grit and repeated handling. An accessory used outdoors should be suitable for the conditions stated by its manufacturer, especially if it attaches close to an exposed charging port or is intended to remain on the bike. Do not assume an accessory is waterproof because the light itself is described as weather-resistant; the properties of the light and each separate component may differ.
If you leave a mount on the bicycle when you remove the light, think about whether it could be knocked, snagged or loosened while the bike is parked. A quick-release arrangement can make taking the light with you easier, but check that the release mechanism is secure in use and compatible with your light. For regular commuting, easy removal can be practical; for a light that stays on the bike, a secure fit and straightforward inspection may matter more.
After fitting an accessory, check it periodically, particularly after a knock, a change of position or a ride on rough roads. Look for cracked plastic, stretched or perished straps, loose fasteners and movement at the connection. Replace damaged parts rather than relying on an improvised repair that could allow a light to move or fall off during a ride.
Bike light accessories for different setups
Commuting and regular town riding
If you take your lights off the bike when you lock it, a compatible quick-to-remove mounting arrangement can make daily use simpler. Check that the fitting is easy to operate with cold or gloved hands if that matters to your routine, and that it does not clash with a bell, computer or handlebar bag. A spare mount can also be useful if you regularly switch the same light between bikes, provided the product is confirmed to fit the light and both mounting positions.
Road, gravel and touring bikes
Road and gravel handlebars may have limited space, especially when you use a computer, bar-mounted bags or other accessories. Check the width and shape of the available mounting area and make sure the light can still be aimed correctly. On a touring bike, a front rack or luggage can affect where a light can be placed; do not choose a bracket until you have checked the arrangement with the bike’s usual load fitted.
E-bike lighting
An accessory for a battery-powered e-bike light may need to match more than the physical mount. Some lighting arrangements are integrated with the bike’s electrical system, while others use a separate rechargeable light. Confirm which type you have and follow the bike and light manufacturers’ compatibility instructions. Do not modify wiring or connect an unknown accessory to the e-bike system. If you need a complete light rather than a part, compare products in the E-Bike Lights category.
Price comparison and product versions
Retailers can list different prices for the same or similar accessories, and availability can vary. Compare the exact product name, model reference, compatible light and included parts before treating two offers as equivalent. A low-priced listing may be for a single component, an older version or a part intended for a different model. Colour or finish can also affect which version is available, although the practical fit should remain the first consideration.
Delivery costs can affect the total price, particularly for a small accessory. Check the retailer’s delivery information and whether the product is sold individually or in a set. SuperBike8 helps you compare products and retailer offers; once you choose an offer, you continue to the retailer. The retailer handles ordering, payment, delivery, returns, warranty and customer service.
Previous-year versions or older colour options may sometimes be listed at a lower price. They can still be suitable if they meet your requirements, but do not assume that a similar name means the fitting or connector is unchanged. Compare the precise product version and compatibility information, especially when replacing a part for a light that has been in use for several years.
Typical buying mistakes with bike light accessories
- Buying by appearance alone: mounts and connectors can look similar while using different interfaces. Confirm the exact light model and stated compatibility.
- Checking the brand but not the model: a manufacturer may use different fittings across its range. Match the accessory to the specific light, not just the logo.
- Assuming a mount fits every handlebar: check the mounting method, available space and any stated size or shape limitations.
- Forgetting nearby equipment: a computer, bell, bag or brake control can obstruct the fitting or make the light difficult to aim.
- Choosing a charging cable by connector shape: confirm the supported light and charging compatibility rather than relying on a visual match.
- Misreading what is included: verify whether the offer is for one part or a set, and check whether straps, fasteners or other pieces are supplied.
- Confusing an accessory with a complete light: read the description to establish whether the product provides illumination or is only a supporting component.
- Ignoring e-bike system requirements: an accessory for a standalone rechargeable light may not be suitable for an integrated e-bike setup.
- Overlooking total cost: compare delivery information as well as the listed product price.
- Failing to check the retailer’s listing: SuperBike8 compares retailer offers, but the retailer’s product page is where you should confirm the selected variant and terms before proceeding.
Three typical buying decisions for Bike Light Accessories
1. Replacing a broken or missing mount
Start with the light’s exact model and find an accessory explicitly stated to fit it. Then check how the mount attaches to your bike and whether the position leaves room for your other handlebar equipment. A mount that appears similar but uses a different light interface is not a reliable substitute.
2. Moving one light between two bikes
Check whether an additional mount is available for your light and whether it can be fitted securely to both bicycles. The bikes may have different handlebar shapes or less space around the controls, so assess each setup separately. Compare the cost and included pieces against repeatedly moving the original mount.
3. Replacing a charging lead
Identify the light model, connector and charging requirements before selecting a lead. Confirm that the listing covers the correct component and check whether any adapter or plug is included rather than assuming it comes with the cable. If the light’s charging port is damaged, establish whether the issue is the port rather than the lead.
Your checklist before you order
- Identify the exact make and model of the bike light.
- Confirm that the accessory is listed as compatible with that model.
- Check the attachment or connector interface, not just the product photograph.
- For a mount, confirm the intended fitting position and available space on the bike.
- Check for possible clashes with a bell, computer, bag, controls or other accessories.
- Make sure the light can be aimed correctly once the accessory is fitted.
- For a charging accessory, verify the connector and supported charging requirements.
- For an e-bike setup, confirm compatibility with the specific light and electrical system.
- Read what is included and whether the listing is for one item or a set.
- Check whether you need to reuse existing straps, fasteners or other components.
- Consider whether you need a fixed fitting or an arrangement that lets you remove the light easily.
- Check the product’s stated suitability for the weather and use you expect.
- Compare the same product version and compatible model across retailer offers.
- Review delivery costs and retailer terms before continuing to an offer.
- After fitting, check that the accessory is secure and the light is correctly positioned.
Frequently asked questions about Bike Light Accessories
Will any bike light mount fit my light?
No. Mounts can use different attachment interfaces, even when they look similar. Check the accessory’s stated compatibility against the full model name of your light and verify that the mount also suits the intended position on your bike.
Can I use one light on more than one bike?
Often this is possible if the light can be removed and you have compatible mounting arrangements for each bike. Check the light’s fitting system and the space available on both bicycles. An additional mount only helps if it is confirmed to fit the light and can be secured to each bike.
How do I choose a replacement charging cable?
Find the light’s exact model and check its manufacturer information for the correct connector and charging requirements. Then compare that information with the accessory listing. Do not choose a cable solely because its plug appears to fit.
Are bike light accessories suitable for e-bikes?
Some may be suitable, but compatibility depends on the light and the e-bike system. A mount for a standalone light is different from a component connected to an integrated electrical system. Check the relevant manufacturer information and do not connect an unknown part to the bike’s wiring.
Does SuperBike8 sell or deliver these accessories?
No. SuperBike8 is a price comparison site where you can compare products and retailer offers. When you choose an offer, you continue to the retailer, which handles ordering, payment, delivery, returns, warranty and customer service.