Superbike8.co.uk – The ultimate bike search engine and price comparison site

Superbike8.co.uk – The ultimate bike search engine and price comparison site
Bike Bells

A bike bell gives you a simple way to alert people nearby, whether you are commuting through town, sharing a path or riding on quiet lanes. The main differences are how the bell is operated, how it sounds and how it fits around the handlebar controls. Read more
Showing 1–12 of 25 results


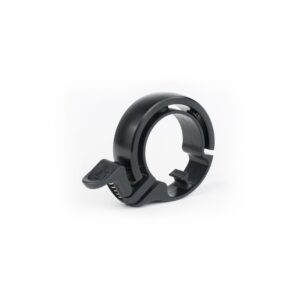
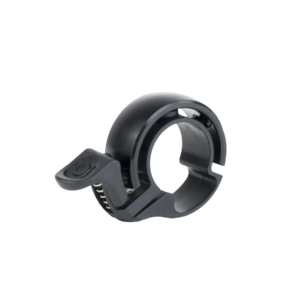
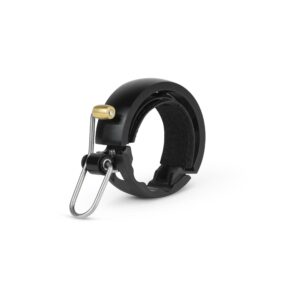
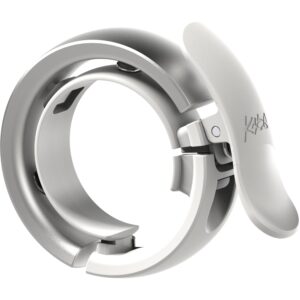


A small thumb-operated bell can keep a road cockpit tidy, while a larger dome or an electronic design may suit riders who want a different sound or operating style.
Fit matters as much as sound. Handlebar diameter, available space and the position of brake levers, gear shifters, grips and any phone mount all affect where a bell can go and whether you can reach it without changing your hand position. Check the mounting details for the individual model rather than assuming that every bell will fit every handlebar.
SuperBike8 is a price comparison site: you can compare bike bells and retailer offers, then continue to the retailer for the offer you choose. Prices and availability can vary by retailer and model. Ordering, payment, delivery, returns, warranty and customer service are handled directly by the retailer.
Bike bell types and how they work
Most bells use a small striker or hammer to make a metal dome vibrate. Some are operated by pressing a thumb lever; others use a rotating striker or a different mechanism. Electronic bells create a signal electronically and may have a button or remote-style control. The best arrangement depends on how you ride and what you find easiest to operate safely.
| Type | What to consider | May suit |
|---|---|---|
| Thumb-operated mechanical bell | A lever or striker is moved with your thumb. Check that it is reachable from your usual hand position and does not obstruct controls. | Everyday commuting and general riding where quick, familiar operation is useful. |
| Rotating-striker bell | The striker is moved around the bell to produce a series of tones. Its operating motion and the space required beside the grip may differ from a thumb lever. | Riders who prefer this style of control and have room on the handlebar. |
| Larger dome bell | The dome takes up more space than many compact designs. Check its diameter, mounting position and clearance from cables and controls. | Bikes with an uncluttered cockpit where a larger bell is easy to fit and reach. |
| Electronic bell | Check the button placement, power source and any battery or charging requirements listed by the manufacturer. The control and sound unit may be separate. | Riders who prefer an electronic control or a sound different from a conventional striker bell. |
Choose a bell for the way you ride
Commuting and busy shared routes
For regular town riding, prioritise an easy-to-reach control and a bell that does not interfere with braking or shifting. You may use it while keeping one hand on the bar, so consider whether its lever is straightforward to operate without reaching across the cockpit. A compact design can leave room for lights, a computer or a phone mount, but compactness should not make the striker awkward to reach.
Think about the surroundings in which you ride. A short, clear alert is often more useful than choosing a bell only for its size or appearance. There is no need to assume that the loudest option is automatically the most suitable: usability, reliable operation and the ability to signal at an appropriate moment are practical priorities.
Road bikes and drop handlebars
Drop bars can have limited space near the tops, brake hoods and handlebar tape. Before choosing a bell, decide where you can operate it while retaining a secure grip and access to the brakes. A small clamp may fit more easily, but mounting location and the bell’s operating mechanism still matter. If you use clip-on accessories, check that their clamps do not compete for the same section of bar.
Do not assume that a bell listed as compact will fit beside every brake hood. Handlebar shape, tape thickness and the position of the controls vary. Check the bell’s stated mounting range and compare it with the usable, unobstructed space on your own bike.
Leisure, touring and everyday bikes
On a flat or swept-back handlebar, there may be more choice of mounting position, but grips and shifters still take up space. A bell that is easy to reach from your normal riding position is preferable to one that only fits in an awkward spot. On a touring bike, allow for accessories such as a handlebar bag, GPS device or lights, and make sure the bell remains accessible when those items are fitted.
For a bike used in different weather, consider exposed moving parts and how the bell is mounted. A simple design may be easier to keep clean, while any bell can become harder to operate if dirt or corrosion affects its mechanism. Follow the manufacturer’s care guidance and check the fixing periodically.
Sound, materials and durability
Mechanical bells commonly use a vibrating metal dome, although the material and shape vary between models. These details influence the bell’s tone and appearance, but they do not by themselves tell you how suitable it will be for your riding. A bell’s perceived sound also depends on the surroundings, distance and background noise. Where a retailer provides sound information, treat it as a guide and consider whether the bell can be operated consistently.
Some bells combine a metal dome with a plastic or metal mounting part. A lighter or smaller construction can be convenient, but pay attention to the security of the clamp and the accessibility of the striker as well. A well-fitted bell should not rotate around the bar when operated. Tighten it according to the maker’s instructions; overtightening can damage a clamp or handlebar component.
Wet rides and road grime can affect moving parts and fixings over time. Wipe away dirt when needed, check that the striker moves freely and make sure the mounting bolt remains secure. If the bell’s sound changes or its mechanism sticks, inspect it for dirt, looseness or wear rather than forcing the control.
Handlebar fit and installation
The most important compatibility detail is the diameter of the bar where the bell will be clamped. Handlebars may have different diameters at different points, and a bell may be intended for a particular mounting range. Check the manufacturer’s stated range and measure the intended section if necessary. Do not rely only on a general description such as “fits standard handlebars”.
Make a quick cockpit check before ordering. Identify the space between the grip and brake or gear controls, then account for cable routing and other accessories. A bell should not push a brake lever out of position, cover a shifter or require you to release your grip substantially to operate it. On some bikes, reversing the bell’s orientation or moving another accessory may help, but only if controls remain safely accessible.
Installation is usually a small task, but follow the instructions supplied with the specific bell. Clamp the bell in a position where you can reach its control naturally, then check that it is secure and that the handlebar and adjacent components are not damaged or obstructed. After fitting, test the bell while stationary and confirm that braking and shifting work as expected.
Compare bike bells and retailer offers
On SuperBike8 you can compare available bike bells and retailer offers in one place. Check the complete product name and model details before comparing: similar-looking bells may differ in their mounting range, operating mechanism, finish or included parts. A product image alone may not show whether the clamp suits your handlebar.
Retailers may list different prices or availability, and delivery costs can affect the overall price. Check whether the listing is for one bell or includes additional components, and read the retailer’s product information for the exact version. If the same bell appears in different colours, confirm that the selected offer is for the colour you want and that its fit and specification match.
Once you have chosen an offer, you continue to the retailer. Ordering, payment, delivery, returns, warranty and customer service are handled directly by that retailer. You can also compare other cycling accessories, including bike lights and handlebar grips, if you are reviewing your cockpit setup at the same time.
Typical bike bell buying mistakes
- Checking only the bell’s appearance: confirm the mounting range and the usable handlebar space before choosing.
- Ignoring the controls: make sure the bell does not obstruct brake levers, gear shifters or their cables.
- Choosing a difficult operating position: a bell that is hard to reach from your normal hand position may be less useful in practice.
- Assuming every handlebar is the same: bar shape and diameter vary, particularly around different sections of drop bars.
- Buying by sound claims alone: consider operation, fit and riding context as well as any sound description.
- Forgetting other accessories: lights, computers, bags and phone mounts can compete for the same space.
- Comparing unlike versions: check model names, colours, mounting details and included parts when comparing retailer offers.
- Over-tightening the clamp: follow the manufacturer’s instructions to avoid damaging the bell, handlebar or other components.
Three typical buying decisions for Bike Bells
1. A compact bell for a crowded commuter cockpit
If your handlebar already carries lights or a computer, start by measuring the free space near the grip and controls. Compare compact models by their clamp range and the direction in which the striker operates. Choose one that remains easy to reach without interfering with braking or shifting, rather than simply selecting the smallest-looking option.
2. A bell for a road bike with drop bars
On drop handlebars, identify a position that you can reach while maintaining a secure grip and access to the brake levers. Check the bell’s dimensions and mounting details against the bar section available on your bike. If the space is restricted, compare designs with different clamp or operating arrangements, but do not compromise control access to make a bell fit.
3. A straightforward option for an everyday or leisure bike
If your bike has a more open handlebar, you may have a wider choice of size and mechanism. Prioritise a bell that is comfortable to operate, secure when clamped and appropriate for your usual routes. Compare the exact model and finish across retailer offers, and check the total cost, including any delivery charge shown by the retailer.
Your checklist before you order
- Is the bell designed for the type and diameter of the handlebar section where you plan to fit it?
- Have you checked the manufacturer’s stated clamp or mounting range?
- Is there enough clear space between the grip, brake controls and shifters?
- Can you reach and operate the striker or button from your usual riding position?
- Will the bell interfere with cables, handlebar tape or other controls?
- Have you allowed room for lights, a computer, a phone mount or a handlebar bag?
- Does the operating mechanism suit how you ride and the hand position you normally use?
- Have you considered the bell’s size as well as its sound and appearance?
- For an electronic model, have you checked its power source and any battery or charging requirements?
- Have you confirmed the exact model, colour and specification in the retailer listing?
- Are you comparing the same version and the same included parts across offers?
- Have you checked delivery costs and the retailer’s listing before continuing to an offer?
- Will you be able to fit the bell securely and follow its installation instructions?
Frequently asked questions about Bike Bells
Will any bike bell fit my handlebars?
No. Bells have different mounting ranges, and handlebars vary in diameter and shape. Check the manufacturer’s fit details and compare them with the exact section of bar where you intend to install the bell.
Where should I mount a bike bell?
Mount it where you can operate it comfortably from your normal hand position without obstructing your brakes, shifters or cables. The best location depends on your handlebar shape, controls and other accessories.
Are electronic bike bells different from mechanical bells?
Yes. Mechanical bells use a striker to make a bell vibrate, while electronic models use an electronic sound unit and control. Check how the control is mounted and what power source the individual model requires.
What should I check before fitting a bell to drop handlebars?
Check the available space near the grips and brake hoods, the bell’s mounting range and whether its control is reachable without compromising your grip or access to the brakes. Make sure it does not interfere with tape, cables or other fittings.
How do I compare bike bell offers on SuperBike8?
Compare the exact model, mounting details, colour and included parts, then consider any delivery costs shown by the retailer. SuperBike8 helps you compare products and retailer offers; ordering and all after-sales arrangements are handled by the retailer you choose.